So what are the advantages of using a (modified) TiddlyWiki for your T1 wiki?
- Easy WikiWords interlinking for deep web of interconnections in your longform knowledge
- Rapid portability between WordPress and TiddlyWiki, with minimal HTML editing
- Super-fast and intuitive navigation removes mental resistance
- Pretty and appealing layout makes it pleasant to write
- Tabs across the top make it easy to work on multiple documents
- Can embed multimedia for full publishing flexibility
- Autosave snapshots to recover work from any point
- Works great with Dropbox
- Highly extensible with active community, good help docs and accessible backend
- Scales indefinitely without performance loss. It’s just text.
Sounds awesome, right? That’s because it is!
Before I discovered Tiddlywiki, I was using Wikidot to organize my T1 content. This worked to some degree, but gradually my adherence fell off. I wound up attempting to create T1 content directly in WordPress – an equally inefficient solution.
Failure to adhere is usually a sign that you’re using the wrong tool or doing the wrong job. So I went searching for a replacement tool… and eventually wound up with TiddlyWiki. But that’s getting ahead of the story. First let’s give the reasons WordPress and Wikidot weren’t adequate.
Why Wikidot and WordPress Weren’t Up For the Job
Problems with Wikidot:
- Slow. Hosted in the cloud, so speed depends on your internet connection.
- Can’t host files or embed video or files.
- Have to learn their proprietary wiki markup language, and therefore can’t cut and paste code directly into WordPress.
- Clunky. Navigation is slow and not fluid. This makes it painful to interweave the content as it scales.
- Tags system will create problems as it grows, scaling inefficiently and increasing cognitive load.
- Difficult to get a sense of the overview.
- Difficult to find last modified stuff.
Summary: Basically I could scale it to about mid size and then adherence would halt. I was left with a discouraging mess that required great concentration to wade back into. It got in the way of writing as much as it helped. And it was a real pain to convert all that formatting for WordPress or an eventual book.
Problems with WordPress:
- The “all posts” view is difficult to effectively filter and sort, even worse than Wikidot.
- Editor interface is too heavy and doesn’t contain any navigation options.
- Interlinking is quite clunky at scale.
- Navigation is slow if hosted in the cloud and installing more than one local copy is technically challenging.
- Very difficult to reshape content on the fly as in a wiki, by redoing article titling and changing tag structure and shifting content around.
Summary: Good for an initial burst of content generation, and easily interopable with T2 and T3 blogs, but difficult to revamp and achieve true T1 integration. Very difficult to look at overviews and big pictures and gain insights on how restructuring should happen.
Searching For Alternatives – First Looks at ConnectedText and TiddlyWiki
I wanted to stick with a wiki format, so I looked at ConnectedText initially. The trial just wasn’t appealing in Wine. It looked ugly and seemed bloated. It wasn’t that fast. It couldn’t do video. The layout was broken in Wine. Worse, I really expected a WYSIWYG editor in a desktop application, but what I got was Yet Another Wiki Markup (YAWM). Writing is an extremely cognitively demanding task, and the last thing I want is to be interrupted by considerations on the number of asterisks I should insert on a line. Especially when the wiki will not be my final publishing format.
When I checked out TiddlyWiki, I immediately liked its prettiness, extensibility and fluidly fast navigation. The concept of scrolling snippets was a fascinating idea – a melding of BrainStormSW sorting technology with TiddlyWiki display would be a very interesting program indeed. But it was also visually confusing – the separations between the Tiddlers weren’t clearly demarked, and having a scrolling page with such a dynamic ordering of content confused the brain. Using the spacebar to scroll up and down led to far too many saccadic eye jumps and rereading to figure out my place. See what I mean by trying to read about TiddlyWiki on its home page.
Still I knew that TiddlyWiki had potential, because I’d previously used mGSD for supplementary task management. I decided to look into customization options. The speed was there… but could it do video and HTML? And could the layout be improved?
Learning TiddlyWiki – Save Yourself Half A Day of Migraines
Thus ensued an epic battle. I was knocked to the canvas three times, exhausted and bewildered. But each time I rose again to return to the fray… and at last got TiddlyWiki to do exactly what I wanted.
Let me save you that battle and tell you everything I figured out the hard way.
First, Install It
There is only one way to install TiddlyWiki – locally, on your hard drive. The hosted versions do not offer the customization we need.
You cannot simply hit “save” at a TiddlyWiki site and download it for personal use. Instead you must download TiddlyWiki from its home page. There is a large blue “download” bar in the center when you first load the page. Somehow I missed that for about 30 minutes. If you start navigating it may disappear, never to be found again.
Hit download, extract the zip, and the folder will contain two files. One is “empty.html” and the other is a .jar file. Copy BOTH files to a new folder and rename “empty.html” to “T1.html”.
Now open T1.html in Firefox and hit “allow” when it asks permission for the script to modify files. TiddlyWiki doesn’t work in Chrome, and you shouldn’t be using Internet Explorer for anything.
How Auto-Save Works
As you use TiddlyWiki (henceforth TW) it will create lots of autosave files. These will fill up the folder. TiddlyWikis are always one file, although they may have dependent files for plugins or multimedia uploads. You can delete your autosaves when you no longer need them. Otherwise they will eventually take up significant disk space. You definitely want autosaves though, because there is no undo feature once you have left the tiddler editor window, and sometimes unexpected things happen to a post’s formatting.
When you edit a Tiddler and hit “done”, a yellow box will appear in the top right that says this:


The second line is the autosave. If you don’t like the change, you can revert. Click the “backup saved” link and it will open a new TW instance in a new tab. This is the version of your TW before the last action. Copy the URL of this backup and then go back to your main TW file. Click the “backstage” link on the top right, and a small black bar will appear across the top of the screen. It will read:

![]()
Click on “import”. The following window will drop down:

Paste the backup URL onto the line that reads “Enter the URL or pathname here:”. For “Specify the type of the server:”, “TiddlyWiki” should be selected. Then hit the “open” button. You will see a list of all the Tiddlers in the backup file:

Select the Tiddler you want to revert. Uncheck the box “Keep these tiddlers linked to this server so that you can synchronise subsequent changes”. Then hit “import”. And you’re done.
If you get an error message when you hit the “import” button, guess what? You’re probably using Firefox 5. Time to downgrade…
Firefox 5 Doesn’t (Always?) Work With TiddlyWiki
Many people find that under Firefox 5 TiddlyWiki’s import function is broken. You NEED this function. It is theoretically possible to do imports manually, but in practice a newbie shouldn’t try it. The solution is easy – downgrade to Firefox 4.
Windows users can get Firefox 4 at http://www.oldapps.com/ . In Ubuntu, you should go into Synaptic Package Manager, select your Firefox package, select the “Package” option in the menu at the top left, and choose “Force Version”. Select version 4 and make sure you don’t automatically upgrade to 5 the next time you use Synaptic.

Let’s Get Oriented – Secrets of TiddlyWiki
I tried to dive straight into using and customizing TiddlyWiki, but I hit a brick wall. Every system has certain bits of critical “tribal knowledge” without which one becomes becomes very lost and frustrated. Let me share those with you now.
TW Tribal Secret #1: There are two TiddlyWiki official wikis, but the new one sucks, and the old one is awesome.
The new wiki is in the default TW format, which makes it hard to navigate. It’s good for a general introduction and not much else.
The old wiki is in the classic Wikipedia format and has very complete info. But it’s not easy to find unless you know the link. Whenever you have a question you should search there first.
TW Tribal Secret #2: Thou shalt use WikiWords for thy tiddler titles
WikiWords are an annoying “feature” that you’ll have to get used to. A WikiWord is any word that has two capital letters separated by lower case letter(s). So BaZooka is a WikiWord but BAzooka isn’t. Got it?
WikiWords are automatically assumed by TW to refer to another tiddler, whether one exists with that title or not. We will add a plugin later to modify that behavior. However, we can’t get rid of WikiWords entirely, so you still need to learn the concept.
Ever tiddler MUST have a WikiWord title. That means no spaces and no dashes in your tiddler titles. Let me demonstrate.
Good examples: “ThisIsMyTitle”, “BazookasAreFun”, “ThisWorksToo”, “Numbers1234AreFine”
Bad examples: “This-Won’t-Work”, “No Spaces Allowed Either”, “youhavetocapitalize”, “BUTNOTTOOMUCH”
Why do we have to follow this rule? Because otherwise we won’t be able to make working wiki links when we’ve installed our rich text editing plugins.
TW Tribal Secret #3: This formatting cheat sheet rocks.
Fortunately we won’t need much wiki formatting. But everything you’ll need to know is on that cheat sheet. The main one? {{{yourtext}}} comments out “yourtext”, preventing TW from parsing any special characters inside. This will be important later.
TW Tribal Secret #4: Shadow tiddlers control TW’s backend and layout.
You can look at your shadow tiddlers by clicking “More->Shadowed” in the grey righthand box.
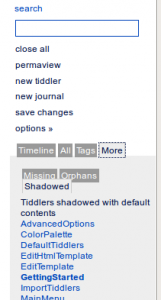

These control layout and contain lots of TW code. We will be editing these later. Shadow tiddlers have titles like “MarkupPreHead”, “OptionsPanel”, etc.
Go ahead and open one. The yellow block is code. Hit “edit”. You can see “<!–{{{–>” at the beginning and “<!–}}}–>” at the end. Your modifications should go between those two, or else they will not be parsed as code.
Ok, that’s it for the TW tribal secrets. Now let’s start customizing!
How To Solve The WikiWords Annoyance??
TW will automatically highlight words as tiddler links that shouldn’t be. For example, “BrainStormSW” gets auto-highlighted. This gets very annoying. It’s probably the first thing you’ll notice when you start adding text into TW.
You can disable this behavior for individual words by putting a “~” in front, like this: ~BrainStormSW. But that’s a tedious solution, and interferes with WordPress interoperability.
Fortunately a plugin exists to solve this problem. It’s called DisableWikiLinksPlugin, and it’s available here. So now we need to learn how to install a plugin in TW.
Installing Your First Plugin
There are two ways to install a plugin – manually and automatically. I don’t recommend the manual option, but it’s good to go over it so you understand what’s going on.
Manually Copying Plugins
Instructions for manual plugin installation are here. I quote:
- Go to the plugin page and click on EDIT to view the source of this particular Tiddler
- Copy the entirety of the source.
- Open your TiddlyWiki and click on NEW TIDDLER
- Give your Tiddler a title (in this case “checkboxPlugin”) and a tag if necessary (for this plugin, we need to add the tag “systemConfig”)
- Paste the code you copied into this Tiddler and click SAVE CHANGES
- Relaunch your TiddlyWiki and you are set!
Don’t forget the “systemConfig” tag. Otherwise it will just be a regular tiddler instead of parsed as part of the TW backend.
As you can see, installing a plugin is quite simple. Just create the tiddler, add the code, and mark it as a system file. Then reload for changes to take effect. But it’s better to do it automatically.
Importing Plugins
There is a much faster way and more reliable to install plugins – by importing them. This is a weird process. Let’s go over it.
For this example, we’re going to import the DisableWikiLinksPlugin. It lives at the URLhttp://www.tiddlytools.com/#DisableWikiLinksPlugin
However, remember that each TiddlyWiki is a single file. So when we attempt to import from this URL, we will get a drop down list of ALL the plugins installed on that TW. We will have to choose the one we want from that list.
Go ahead and click “import” in your backstage area. Add the above URL in the source field and click “open”. You will see a very long list appear. It’s in alphabetical order. Find the DisableWikiLinksPlugin entry. Select ONLY that entry.
Note that there is another tiddler right next to it called “DisableWikiLinksList”. Do not copy this one. There are often configuration tiddlers with names similar to the plugin name, but you do NOT need to copy them to import the plugin. And doing so will often break something. Each plugin is always a single tiddler.
Now scroll down to the bottom of the list and click “import”. Congrats, you’ve imported your plugin. But you’re not done. You need to set the plugin’s configuration options.
If it’s not open already, you can find the new plugin under the “All” tab of the right-hand grey box. Open it. You will see a heading called “Configuration”. Uncheck “Disable ALL automatic WikiWord tiddler links”, and check “Disable automatic WikiWord links for non-existing tiddlers”.

These settings will let you easily invoke tiddler links when you want to, i.e. when a tiddler with that name exists. But it will not invoke tiddler links for random words that happen to have WikiWord capitalization. If you want to force a link, you can surround the word in double brackets [[LikeThis]].
After changing the settings, refresh your TW so the changes take effect. Now go to backstage->plugins. You can see a list of active plugins, which should now include DisableWikiLinksPlugin.
Test whether it’s working by typing “FakeWikiLink” into a new tiddler. If it does not automatically highlight it as a link when you hit done, then it’s working. Also try typing “GettingStarted”, which should be recognized as a WikiWord and linked automatically.
Congratulations! You’re done. Now let’s completely pimp out your TW.
Let’s Find A Better Layout
There are a vast number of TW plugins, too many to try. The major plugin repositories arehere, here and here. The first link indexes all the others, but it doesn’t actually contain any plugins, it just provides links.
Earlier I mentioned the problems with TW’s default layout and markup. It’s not quite ready to act as our T1 repository. After searching around, I found an interesting TW implementation called NoteStorm, which you can see here. The SlideShowTutorial tiddler there is proof of concept that TW can do videos. I encourage you to watch that slideshowto see what TW is capable of.
You should refer to NoteStorm for plugin ideas for javascript capability, drag and drop file attachments, tag management, better search, etc. But unfortunately NoteStorm’s layout is not suitable for T1, because it automatically outlines every new tiddler in the left tree nav pane. T1 must be wiki interlinked, not bound by a primitive and inflexible outliner.
The next example I found is perfect: VisualTW
In VisualTW, you control the left outline pane with tags, so new entries are not automatically added. To add a parent entry, create a tiddler with a new tag. To create subordinates, create a tiddler named after the parent tag, and tag it with the subordinate tags. All tiddlers with the subordinate tags will appear below the parent entry. Furthermore you can control which tags appear on the menu by editing a stylesheet. So even after your T1 scales to hundreds of entries, you can focus on whatever area you’re currently working on.
VisualTW also has full HTML editing, making it easy to export to WordPress. Its layout opens additional tiddlers as new tabs rather than a scrolling list, which is good for handling long T1 documents. In short, it’s perfect. So that’s what we’re going to install.
Installing VisualTW
VisualTW’s plugins are listed in its the left nav pane and explained in their respective entries. We will install five plugins:
- FCKeditorPlugin
- SyncFromSourcePlugin
- TagsTreePlugin
- TiddlersBarPlugin
- HTMLFormattingPlugin
Open your upload pane, paste http://visualtw.ouvaton.org/VisualTW.html into the URL field, and hit “open”. Select the above five plugins and hit “import”.
Now let’s configure and finish installing them.
FCKeditorPlugin
Follow the installation instructions on the plugin’s tiddler. By now you should be able to understand and follow the directions. Here are a few hints to help:
1. Unzip the FCKeditor download into a folder next to your TW file. Name the folder “fckeditor”. When you open the folder you should see a long list of files.
2. The text you must add to MarkupPreHead should go between the code tags so that is is parsed. Refer back to the Shadowtiddler section if confused.
3. To add the wysiwyg button to your toolbar, edit the tiddler ToolbarCommands. The only text you should add is “+editHtml”, so that it looks like this:
|~ViewToolbar|closeTiddler closeOthers +editTiddler +editHtml > fields syncing permalink references jump|
|~EditToolbar|+saveTiddler -cancelTiddler deleteTiddler|
4. Reload. If you see a “wysiwyg” button next to your “edit” button on the tiddler top right menu, then it’s working. Click “wysiwyg” and a full paneled HTML editor should display after a second or two.
SyncFromSource
No changes needed. Make sure NOT to sync tiddlers if you don’t want them to constantly revert to the source version. Syncing doesn’t affect options set on plugin tiddlers.
TagsTree
No changes needed. This creates the left outline pane. Note that you can edit the stylesheet. Refer to the VisualTW example site for how to do this, and the plugin instructions page. Look at the tags for parent and subordinate tiddlers on the VisualTW site to learn how to structure your outline.
TiddlersBar
No changes needed. This creates tabs across the top of your screen.
HTMLFormattingPlugin
Without this plugin you won’t be able to make WikiLinks in the HTML editor. Which would defeat the purpose of having a wiki. So this plugin is quite important. Note that if you get weird formatting problems, it’s probably because TW is parsing special characters as wiki markup when you don’t want it to. Surround those characters with {{{ }}} to prevent them from parsing. For example, if you have a note* like this, you would have to type that as note{{{*}}}. Otherwise TW will think you want bullet formatting where the * is.
Congrats, You’re Done
Quite simply this is the best way to build up your complete body of interconnected T1 longform knowledge. It’s a breeze and a pleasure to use. Enjoy!